前几天发现了一个好玩的网站, 它提供Google的搜索服务, 也许你会说这没什么, 随便哪里都有. 但这个网站可不一样, 它是纯命令行的搜索. 网页模拟成了终端, 而你需要输入相应的命令. 偶尔用用还是很有趣的.

$ sudo apt-get install dia
"// ", 然后我就可以很方便地添加注释了. 可今天很神奇, 突然就从"// "变成"/* */"了, 这样很是不爽. 看了下Emacs的帮助文档, 发现无论是"// ", 还是"/* */", 都是由两个变量来控制的. 一个叫做comment-start, 另一个是comment-end, 分别控制开头和结尾. 比如说"/* */"这个, 它的comment-start就是"/* ", 而comment-end则是" */". 所以只需要在我的配置文件的C Mode里面添加下面两行就行了:(setq comment-start "// ")
(setq comment-end "")
/*光标在中间那行, 当我输入完注释以后回车想输入下一行, 却发现Emacs不会自动跳到相应的位置并且添加那个星号, 在Vim里就可以. 难道Emacs不支持? 其实不是, 你不需要使用回车来换行, 当你想要输入下一行注释时, 按M-j就行了, 效果和Vim中是一样的, 呵呵~
* ...
*/
comment-column. 这个变量的默认值是32, 每行注释都会从32列开始, 所以会很整齐了.
$ sudo apt-get install subversion然后强烈推荐一本SVN的教程: Version Control with Subversion, 这本书虽然有中译本, 但版本太老了, 还是讲1.4的 (现在SVN的版本是1.5.1), 所以还是看原版吧. 绝对是本好书, 光看已经由O'Reilly出版了就知道了. 还是要感谢下作者, 将这本书免费地放到网上 (其实这本书就是由SVN来管理的).
$ sudo apt-get install gnome-do使用Super+空格来呼唤出GNOME Do, Esc退出. 一定要记得去勾选适合自己的插件哦, 这样GNOME Do的威力才能更好地发挥出来呢. 下面是一些截图:


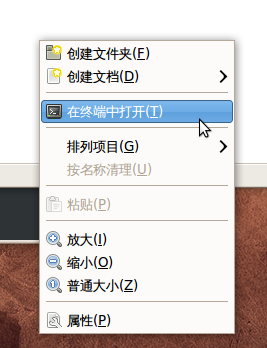
$ sudo apt-get install nautilus-open-terminal重启即可.
2010.11.22 10:20更新: 今天才发现我当初是没有弄清楚Vim寻找tags文件的方式, 现在看来, 只需要在源码根目录执行"ctags -R", 然后每次都使用这一个tags文件即可. 因此下面的做法相当于画蛇添足, 现仅留作存档.
2010.11.22凌晨更新: 下面的脚本中由于find用到了扩展的POSIX正则表达式, 因此请注意检查你系统中的find是否支持, 比如BSD系统自带的find就只支持标准的正则表达式.
昨天本来想看下xlockmore的源码的, 开始以为Vim + Tag List就差不多了, 后来发现不行的, 源码里面包含了一些include文件中的类型定义啊, 函数定义啊这些的, 想去看下原型都不行.
ctags, 在我正在查看的源文件的目录下生成了一个tags文件. 这下好了, 可以跳转查看了, 不过马上新的麻烦又来了. 我还想在这个新跳转的文件中继续跳转, 但由于它同刚才的不在同一个目录, 所以Vim找不到相应的tags文件. 真是麻烦, 看来必须在每一个目录下都生成一个tags文件才行, 不过我很懒, 不想手动进入每一个目录, 然后重复执行那行命令. 查了一会儿ctags的man page, 没找到想要的功能, 又Google了一下, 还是没找到, 倒是找到了和我遇到相同麻烦的人, 呵呵~ 问了下joy, 貌似他也不是很清楚, 于是我就干脆写个脚本算了. 把这个脚本放在包含所有源码的根目录执行就行了.
#!/bin/bash

if which ctags > /dev/null; then
    echo "Hey, I get it!" > /dev/null
else
    echo "ctags is needed"
    exit 1
fi

base_dir=`pwd`
extension="\([cC]\|[cC][pP][pP]\|[hH]\)"

cd "$base_dir"
for dir in `find . -type d`; do
    cd "$dir"
    file=`find . -maxdepth 1 -regex ".*\.${extension}" -execdir echo 'found' \; -quit`
    if [ -n "$file" ]; then
        echo "$dir"
        ctags -R "$base_dir"
    fi
    cd "$base_dir"
done

exit 0
顺便记下在Vim中通过tags文件跳转的命令:
g^]  跳转
^T   跳回
然后还有个cscope, 可以用来搜索源码, 还没怎么用过.
P.S. xlockmore的源码看着真是费劲, n多的宏定义和typedef, 害得我头都看晕了...
$ cat ~/.gtkrc-2.0
# Emacs-like Keybindings
include "/usr/share/themes/Emacs/gtk-2.0-key/gtkrc"
gtk-key-theme-name="Emacs"
$ cat ~/.Xresources然后
Xft.antialias:1
Xft.hinting:1
Xft.hintstyle:hintfull
Emacs.FontBackend:xft
$ xrdb ~/.Xresources
$ cat ~/.indent.pro
-bl        // Put braces on line after if, etc.
-bli0      // Indent braces n spacs.
-bls       // Put braces on the line after struct declaration lines.
-c32       // Put comments to the right of code in column n.
-cd32      // Put comments to the right of declarations in column n.
-cp32      // Put comments to the right of #else and #endif statements in column n.
-i4        // Set indentation level to n spaces.
-kr        // Use Kernighan & Ritchie coding style.
-nce       // Do not cuddle } and else.
$ cat ~/.emacs
;; template
(require 'template)
(template-initialize)

;; auto-header.el
(require 'auto-header)
(setq header-full-name "Dreamseeker"
      header-email-address "gaochangjian<at>gmail<dot>com"
      header-copyright-notice "Copyleft (c) INF, Dreamseeker"
      header-update-on-save '(filename modified counter copyright)
      header-field-list '(filename
                          blank
                          description
                          blank
                          author
                          created
                          blank
                          modified_by
                          modified
                          blank
                          status
                          update
                          blank
                          copyright))
;; auto update the number of count
(global-set-key (kbd "s-h") (lambda ()
                              (interactive)
                              (if (header-exists-p)
                                  (header-update-count)
                                (header-make t))))
$ cat ~/.mplayer/config
zoom=yes
;; EMMS参考了这篇文章.
(add-to-list 'load-path "/usr/share/emacs/site-lisp/emms/")
(require 'emms-setup)
(emms-standard)
(emms-default-players)
(setq emms-repeat-playlist t
emms-source-file-default-directory "/home/xiaolan/music/"
emms-lyrics-coding-system nil ;; let emacs to identify the encode of lyrics
emms-lyrics-dir "/home/xiaolan/music/lyrics")
;; show info at mode-line
(require 'emms-mode-line)
(emms-mode-line 1)
;; show time of music
(require 'emms-playing-time)
(emms-playing-time 1)
;; show lyrics
(require 'emms-lyrics)
(emms-lyrics 1)
;; auto identify encode
(require 'emms-i18n)
;; auto save and import playlist
(require 'emms-history)
(emms-history-load)
(global-set-key (kbd "<f6>") 'emms-play-directory)
(global-set-key (kbd "<f5>") 'emms-playlist-mode-go)

$ xetex --version感觉就是一个字: 爽! 哈哈~
XeTeX 3.1415926-2.2-0.999.6 (Web2C 7.5.7)
kpathsea version 3.5.7
Copyright 2008 SIL International.
Kpathsea is copyright 2008 Karl Berry and Olaf Weber.
There is NO warranty. Redistribution of this software is
covered by the terms of both the XeTeX copyright and
the Lesser GNU General Public License.
For more information about these matters, see the file
named COPYING and the XeTeX source.
Primary author of XeTeX: Jonathan Kew.
Kpathsea written by Karl Berry, Olaf Weber, and others.
Compiled with ICU version 3.8.1 [with modifications for XeTeX]
Compiled with zlib version 1.2.3; using 1.2.3.3
Compiled with FreeType2 version 2.3.7; using 2.3.7
Compiled with fontconfig version 2.6.0; using 2.6.0
Compiled with libpng version 1.2.29; using 1.2.32
Compiled with xpdf version 3.02pl2
$ sudo pacman -S texlive-core texlive-latexextra
$ sudo mktexlsr
\usepackage{xeCJK}

\setmainfont[BoldFont=Adobe Heiti Std]{Adobe Song Std} % 设置默认的英文字体
\setCJKmainfont[BoldFont=Adobe Heiti Std]{Adobe Song Std} % 设置默认的中文字体. /etc/bash_completion
$ cat ~/.gvimrc而颜色问题则困扰了我一段时间, 后来无意中发现Vim的一个全局配置文件/etc/gvimrc, 才找到了问题的根源. 原来是这个文件修改了颜色的配置, 遂注释掉相应部分, 于是我熟悉的界面又全部回来了.
set encoding=utf8
set langmenu=zh_CN.UTF-8
set imcmdline
source $VIMRUNTIME/delmenu.vim
source $VIMRUNTIME/menu.vim
$ cat /etc/udev/rules.d/10-automount.rules我觉得这个还不错, 很方便, 那个文件是我自己建的, 本来是没有的. 如果你要手动挂载的话, 那么推荐你用pmount, 这个可以允许非root用户挂载可移动设备, 而且没有乱码, 也没有权限问题.
KERNEL=="sd[b-z]", NAME="%k", SYMLINK+="usbhd-%k", GROUP="users", OPTIONS="last_rule"
ACTION=="add", KERNEL=="sd[b-z][0-9]", SYMLINK+="usbhd-%k", GROUP="users", NAME="%k"
ACTION=="add", KERNEL=="sd[b-z][0-9]", RUN+="/bin/mkdir -p /media/usbhd-%k"
ACTION=="add", KERNEL=="sd[b-z][0-9]", PROGRAM=="/lib/udev/vol_id -t %N", RESULT=="vfat",
RUN+="/bin/mount -t vfat -o rw,utf8=true,codepage=936,noauto,flush,quiet,nodev,
nosuid,noexec,noatime,dmask=000,fmask=111 /dev/%k /media/usbhd-%k", OPTIONS="last_rule"
ACTION=="add", KERNEL=="sd[b-z][0-9]", RUN+="/bin/mount -t auto -o rw,locale=zh_CN.UTF-8,noauto,
sync,dirsync,noexec,nodev,noatime /dev/%k /media/usbhd-%k", OPTIONS="last_rule"
ACTION=="remove", KERNEL=="sd[b-z][0-9]", RUN+="/bin/umount -l /media/usbhd-%k"
ACTION=="remove", KERNEL=="sd[b-z][0-9]", RUN+="/bin/rm -rf /media/usbhd-%k", OPTIONS="last_rule"
clocksource tsc unstable开始还以为是升级出现的问题, 因为我每次都是升完级重启以后就出现这个错误, 然后系统就进不了了. 为此我重装了至少两三次(真有毅力 - -), 最后无奈Google了一下, 发现居然是AMD+ATI的问题, 而且解决方法也是如此简单, 当时就想晕了... 在grub的启动菜单的kernel中加一个参数clocksource=acpi_pm就行了.
\usepackage{color}
\usepackage{framed}

\definecolor{shadecolor}{gray}{0.85}
放在导言区就行了, 然后像这样处理代码:\begin{shaded}
\begin{verbatim}
...
\end{verbatim}
\end{shaded}什么跨页, 什么换行, 一切都搞定, 哈哈~\setsansfont{DejaVu Sans YuanTi Mono}
\makeatletter
\def\verbatim@font{\sffamily\small}
\makeatother只好忍痛替换了tt字体, 用上了猪猪的强大字体, 等宽加中文都支持.\phantomsection % 让目录中的链接正确
\section*{\textcolor{darkgreen}{\textbf{本刊致谢}}} % 不显示编号, 并且不出现在目录中
\addcontentsline{toc}{section}{卷首语} % 添加到目录中
\sectionmark{卷首语} % 页眉
\usepackage{float}

\begin{figure}[H] % 就是这个神奇的H
...
\end{figure}\setcounter{page}{0}这句就将页码的计数器设置为0了, 所以放在第2页的代码前面就行了.javaldx: Could not find a Java Runtime Environment!开始以为是Java的环境变量配置错误, 又按照Ubuntu Wiki上的设置重新检查了一次, 结果还是出现那个提示, 后来在Ubuntu官方论坛上找到了解决办法:
sudo apt-get install openoffice.org-java-common
$ cat ~/.XresourcesPyPanel的部分配置, 只是把我修改过的贴了出来, 其它的都是默认的:
! font
URxvt.font:xft:Bitstream Vera Sans Mono:pixelsize=13:antialias=true,
xft:WenQuanYi Zen Hei:pixelsize=13:antialias=true
! color
URxvt.foreground:#ffffff
URxvt.background:#2e3436
URxvt.color0:#2e3436
URxvt.color1:#cc0000
URxvt.color2:#4e9a06
URxvt.color3:#c4a000
URxvt.color4:#3465a4
URxvt.color5:#75507b
URxvt.color6:#06989a
URxvt.color7:#d3d7cf
URxvt.color8:#555753
URxvt.color9:#ef2929
URxvt.color10:#8ae234
URxvt.color11:#fce94f
URxvt.color12:#729fcf
URxvt.color13:#ad7fa8
URxvt.color14:#34e2e2
URxvt.color15:#eeeeec
! follow URL
URxvt.urlLauncher:firefox
URxvt.matcher.button:1
URxvt.perl-ext-common:matcher
! scrollbar
URxvt.scrollBar:True
URxvt.scrollBar_right:True
URxvt.scrollBar_floating:False
URxvt.scrollstyle:plain
URxvt.saveLines:500
$ cat ~/.pypanelrcOpenbox:
#------------------------------------------------------------------------------
# Colors: Format is hex triplet - 0xrrggbb
#------------------------------------------------------------------------------
BG_COLOR = "0x000000" # Panel background and tinting color
TASK_COLOR = "0xffffff" # Normal task name color
FOCUSED_COLOR = "0x33ccff" # Focused task name color
SHADED_COLOR = "0x808080" # Shaded task name color
MINIMIZED_COLOR = "0x808080" # Minimized task name color
DESKTOP_COLOR = "0xffffff" # Desktop name color
CLOCK_COLOR = "0xffffff" # Clock text color
LINE_COLOR = "0x606060" # Vertical line color
#------------------------------------------------------------------------------
# Panel Spacing and Location Options: Measured in pixels
#------------------------------------------------------------------------------
P_LOCATION = 1 # Panel placement: 0 = top, 1 = bottom
P_WIDTH = 1400 # Panel width: 0 = Use full screen width
P_START = 20 # Starting X coordinate of the panel
P_SPACER = 0 # Spacing between panel objects
P_HEIGHT = 24 # Panel height
#------------------------------------------------------------------------------
# Panel Text Font: This option takes either a traditional or Xft font string
# Ex: "-schumacher-clean-medium-r-normal-*-12-*-*-*-*-*-*-*"
# "aquafont-8"
#------------------------------------------------------------------------------
FONT = "DejaVu Sans YuanTi-11"
#------------------------------------------------------------------------------
# Background Alpha/Shade Level: 0 (Fully Translucent) -> 255 (Fully Opaque)
# BG_COLOR is used for tinting
#------------------------------------------------------------------------------
SHADE = 255
#------------------------------------------------------------------------------
# Misc. Options: 1 = Enabled/Yes, 0 = Disabled/No
#------------------------------------------------------------------------------
ABOVE = 1 # Panel is always above other apps
APPICONS = 1 # Show application icons
AUTOHIDE = 0 # Autohide uses the CLOCK_DELAY timer above
SHADOWS = 0 # Show text shadows
SHOWLINES = 1 # Show object seperation lines
SHOWBORDER = 0 # Show a border around the panel
#------------------------------------------------------------------------------
# Panel Layout: -----------------------------------
# [ 1 ][ 2 ][ 3 ][ 4 ][ 5 ]
# -----------------------------------
#
# The panel layout is split into 5 sections numbered 1, 2, 3, 4 or 5 as shown
# in the diagram above. Each of the following objects can be enabled by
# assigning it a section number or disabled by assigning it 0:
#------------------------------------------------------------------------------
DESKTOP = 0 # Desktop name section
LAUNCHER = 0 # Application launcher section
TASKS = 3 # Task names section
TRAY = 4 # System tray section
CLOCK = 5 # Clock section
$ cat ~/.config/openbox/autostart.sh
#!/bin/bash

# PyPanel
if which pypanel > /dev/null; then
  pypanel &
fi

# use feh to set the background
if [ -f $HOME/.fehbg ]; then
  eval `cat $HOME/.fehbg` &
fi

# D-bus
if which dbus-launch >/dev/null && test -z "$DBUS_SESSION_BUS_ADDRESS"; then
       eval `dbus-launch --sh-syntax --exit-with-session`
fi

# Make GTK apps look and behave how they were set up in the gnome config tools
if which gnome-settings-daemon >/dev/null; then
  gnome-settings-daemon &
fi

# Preload stuff for KDE apps
if which start_kdeinit >/dev/null; then
  LD_BIND_NOW=true start_kdeinit --new-startup +kcminit_startup &
fi

# colorful man page
export PAGER="/usr/bin/less -s"
export BROWSER="$PAGER"
export LESS_TERMCAP_mb=$'\E[01;34m'
export LESS_TERMCAP_md=$'\E[01;34m'
export LESS_TERMCAP_me=$'\E[0m'
export LESS_TERMCAP_se=$'\E[0m'
export LESS_TERMCAP_so=$'\E[01;44;33m'
export LESS_TERMCAP_ue=$'\E[0m'
export LESS_TERMCAP_us=$'\E[01;33m'
// -1156203886以上代码的输出结果为"in Derived", 最开始我一直想不通为什么可以在类的外部访问一个私有成员函数, 经过一番搜索以后, 知道了原因.
#include <iostream>
using namespace std;
class Base
{
public:
virtual ~Base() {}
virtual void debugPrint() const
{
cout << "in Base" << endl;
}
};
class Derived : public Base
{
private:
void debugPrint() const
{
cout << "in Derived" << endl;
}
};
int main()
{
Base* aPo = new Derived();
aPo->debugPrint();
return 0;
}
这段代码的问题在于, 编译时是不会有错误的, 因为那个指针的静态类型是指向基类的对象的, 而基类中的虚函数是public的, 可以直接在外部访问, 这在编译器看来是没有一点错误的. 然而动态绑定却是在实际运行时, 这时候指针就转到子类里了, 它不会判断这个成员到底是私有还是公有的, 所以就输出了上面的结果. 有人把这看成是C++的一个bug, 也有人认为这符合OO的思想, 向类的用户隐藏了细节, 唯一不对的是这样的编程风格.
sudo apt-get install python-mutagen使用方法:
$ mid3v2 -a 陈绮贞 -A 失败者的飞翔 -t 失败者的飞翔 失败者的飞翔.mp3
sudo apt-get install exfalso这是界面截图:

这几天折腾了一下LaTeX, 对于其中的概念也有了一些了解. 这篇日志主要是说下在Ubuntu 8.04下配置LaTeX+XeTeX环境的过程, 还有Emacs里的AUCTeX的配置.
$ sudo apt-get install texlive texlive-latex-extra texlive-xetex lmodern
当时为了安装最新的XeTeX, 花了很多时间在编译安装上, 最后只弄好一个半成品, 无法使用. 于是决定舍弃zhspacing宏包, 直接装了源里的XeTeX.
经过以上步骤后, 应该就可以正常编译TeX文件了, 用XeTeX调整字体也很爽. 如果你也使用Emacs来编辑TeX文件的话, 那么一定要安上AUCTeX这个扩展, 下面是一些配置详情.
$ sudo apt-get install auctex
;; AUCTeX
(defun auctex ()
  (add-to-list 'TeX-command-list '("XeLaTeX" "%`xelatex%(mode)%' %t; %`xelatex%(mode)%' %t" TeX-run-TeX nil t)) ;; 这里我编译了两次
    (setq TeX-command-default "XeLaTeX") ;; 设定默认编译命令为XeLaTeX
    (setq TeX-save-query nil)            ;; 保存之前不询问
    (setq TeX-show-compilation t))       ;; 在新窗口显示编译过程
(add-hook 'LaTeX-mode-hook 'auctex)

(custom-set-variables
 '(TeX-output-view-style (quote (("^dvi$nnnnnnn" ("^landscape$" "^pstricks$\\|^pst-\\|^psfrag$") "%(o?)dvips -t landscape %d -o && gv %f") ("^dvi$" "^pstricks$\\|^pst-\\|^psfrag$" "%(o?)dvips %d -o && gv %f") ("^dvi$" ("^a4\\(?:dutch\\|paper\\|wide\\)\\|sem-a4$" "^landscape$") "%(o?)xdvi %dS -paper a4r -s 0 %d") ("^dvi$" "^a4\\(?:dutch\\|paper\\|wide\\)\\|sem-a4$" "%(o?)xdvi %dS -paper a4 %d") ("^dvi$" ("^a5\\(?:comb\\|paper\\)$" "^landscape$") "%(o?)xdvi %dS -paper a5r -s 0 %d") ("^dvi$" "^a5\\(?:comb\\|paper\\)$" "%(o?)xdvi %dS -paper a5 %d") ("^dvi$" "^b5paper$" "%(o?)xdvi %dS -paper b5 %d") ("^dvi$" "^letterpaper$" "%(o?)xdvi %dS -paper us %d") ("^dvi$" "^legalpaper$" "%(o?)xdvi %dS -paper legal %d") ("^dvi$" "^executivepaper$" "%(o?)xdvi %dS -paper 7.25x10.5in %d") ("^dvi$" "." "%(o?)xdvi %dS %d") ("^pdf$" "." "acroread %o %(outpage)") ("^html?$" "." "netscape %o")))))
最后那个有点长, 主要是没有找到合适的方法像添加XeLaTeX一样只需要写新增的条目, 所以这里就把原有的和修改以后的都写了出来. 其实只改了一个地方, 已经用红色标注出来了, 就是在使用C-c C-v预览PDF文件的时候使用什么软件来打开. 我这里就是acroread, 你用的其它的话, 可以相应修改.
这样修改好以后, 以后就可以直接使用C-c C-c编译, C-c C-v预览, C-c `在错误间跳转了.
8月5日更新:
如果不是用的源安装的LaTeX, 比如我为了用上最新版的XeTeX, 就选择单独安装TeX Live. 这时再用源安装AUCTeX的时候, 会因为依赖关系而又把源里的LaTeX相关包给装上, 囧
$ echo $PATH
/home/xiaogaozi/bin:/usr/local/sbin:/usr/local/bin:/usr/sbin:/usr/bin:/sbin:/bin:/usr/games
嘿嘿, 我的TeX Live的可执行文件都放在了/usr/local/bin里, 而源里安装的放在了/usr/bin, 自然优先级不同啦~
install-info文件会导致源安装AUCTeX的时候失败, 所以如果是先安装的TeX Live, 再安装AUCTeX, 就需要先把TeX Live的install-info"消灭"掉:
$ sudo mv /usr/local/bin/install-info /usr/local/bin/install-info.bak
附上我的TeX文件模板, 很杂, 也许有的在article上能用上, 而有的则只能在book上用上.
\documentclass[adobefonts]{ctexart}

\CTEXoptions[captiondelimiter={\quad}]

\usepackage{amsmath}            % AMS的数学宏包
\usepackage{amssymb}            % AMS的数学符号宏包
\usepackage{graphicx}           % 插入图片需要的宏包
\usepackage{float}              % 强大的浮动环境控制宏包
\usepackage{framed}             % `shaded'环境需要用到
\usepackage{enumitem}           % 增强列表功能
\usepackage{alltt}              % 在`alltt'环境中为等宽字体, 但可以使用LaTeX命令

% \usepackage{shortvrb}           % 简化\verb的写法
% \MakeShortVerb{\|}

\usepackage{color}              % 可以定义各种颜色
\usepackage[x11names]{xcolor}   % 下面的RoyalBlue3颜色需要用到的宏包
% 自定义的几种颜色
\definecolor{shadecolor}{gray}{0.85}
% \definecolor{darkblue}{rgb}{52,101,164}
% \definecolor{darkgreen}{rgb}{78,154,6}

% % 设置背景颜色
% \definecolor{bisque}{rgb}{.996,.891,.755}
% \pagecolor{bisque}

\usepackage[pdfauthor={Dreamseeker},
            pdftitle={For Alist},
            colorlinks=true,
            urlcolor=blue,
            linkcolor=RoyalBlue3]{hyperref} % 为超链接设置颜色, 修改PDF文件信息

\title{\textbf{For Alist}}
\author{Dreamseeker}
% \date{}

\usepackage[pagestyles]{titlesec} % 定制页眉页脚
% % 设置页眉页脚
% \newpagestyle{main}{%
%   \sethead[$\cdot$~\thepage~$\cdot$][][\thesection\quad%
%   \sectiontitle]{\thesection\quad\sectiontitle}{}{%
%   $\cdot$~\thepage~$\cdot$}
%   \setfoot{}{}{}\headrule}
% \pagestyle{main}
% \renewpagestyle{plain}{\sethead{}{}{}\setfoot{}{}{}}
\pagestyle{plain}

\usepackage[top=1in,bottom=1in,left=1.25in,right=1.25in]{geometry} % 设置页边距

\setlength{\belowcaptionskip}{1em} % 设置caption之后的距离

% XeTeX logo
\def\XeTeX{\leavevmode
\setbox0=\hbox{X\lower.5ex\hbox{\kern-.15em\reflectbox{E}}\kern-.1667em
\TeX}%
\dp0=0pt\ht0=0pt\box0}

% For LaN
\newcommand{\LaN}{L{\scriptsize\hspace{-0.47em}\raisebox{0.23em}{A}}\hspace{-0.1em}N}

\begin{document}

\maketitle

\tableofcontents
\newpage

\end{document}
另外推荐下好用的LaTeX, XeTeX入门文档:
int i;上面这段代码中, 在要求输入i的地方, 如果输入了非数字, 就会造成死循环. 具体原因在于非数字字符仍然保留在缓冲区中, 所以当下一次cin读取的时候, 就直接从缓冲区中读取, 这样一直循环, 每次都是读取的非数字字符, 造成了死循环. 修改else里面的语句为:
while (1)
{
cout << "input a number: ";
cin >> i;
if(cin && i >= 0 && i <= 100)
break;
else
{
cin.clear();
cout << "error" << endl;
}
}
elseignore()的作用主要是从缓冲区中取字符并丢弃, 就起到了刷新缓冲区的作用.
{
cin.clear();
cin.ignore(1024, '\n');
cout << "error" << endl;
}
(setq-default indent-tabs-mode nil)对于已经保存好的文件, 可以选中需要转化的区域, 然后:
M-x untabify
set expandtab对于已经保存好的文件, 可以选中需要转化的区域, 然后:
:retab

h, j, k, l
这几个和Vim中的一样, 移动光标
C-t
在新标签中打开链接
C-q
关闭当前标签
{
前一个标签
}
后一个标签
C-v
下一页
b
上一页
q
退出
o
设置w3m的选项
H
帮助

[General]
XftHintStyle=hintmedium
StandardFont=DejaVu Sans YuanTi,9,-1,5,50,0,0,0,0,0
activeFont=DejaVu Sans YuanTi,9,-1,5,50,0,0,0,0,0
fixed=Bitstream Vera Sans Mono,9,-1,5,50,0,0,0,0,0
font=DejaVu Sans YuanTi,9,-1,5,50,0,0,0,0,0
menuFont=DejaVu Sans YuanTi,9,-1,5,50,0,0,0,0,0
taskbarFont=DejaVu Sans YuanTi,9,-1,5,50,0,0,0,0,0
toolbarFont=DejaVu Sans YuanTi,9,-1,5,50,0,0,0,0,0
1. ./configure --enable-ocamlver=3.10.2 # 如果你没有安装OCaml 3.10.2, 那么中途会有一个询问是否去网上下载并安装, y即可P.S. MLDonkey的编译真先进, 用着就一个感觉: 爽, 差不多和apt一样智能了.
2. make
3. 这里不需要执行sudo make install了, 执行sudo cp mlnet /usr/bin

sudo apt-get install most创建.mostrc
$ cat ~/.mostrc修改.bashrc
% Color settings
color normal lightgray black
color status yellow blue
color underline yellow black
color overstrike brightblue black
% less-like keybindings
unsetkey "^K"
unsetkey "g"
unsetkey "G"
unsetkey ":"
setkey next_file ":n"
setkey find_file ":e"
setkey next_file ":p"
setkey toggle_options ":o"
setkey toggle_case ":c"
setkey delete_file ":d"
setkey exit ":q"
setkey bob "g"
setkey eob "G"
setkey down "e"
setkey down "E"
setkey down "j"
setkey down "^N"
setkey up "y"
setkey up "^Y"
setkey up "k"
setkey up "^P"
setkey up "^K"
setkey page_down "f"
setkey page_down "^F"
setkey page_up "b"
setkey page_up "^B"
setkey other_window "z"
setkey other_window "w"
setkey search_backward "?"
setkey bob "p"
setkey goto_mark "'"
setkey find_file "E"
setkey edit "v"
# most
export PAGER='/usr/bin/most -s'
export BROWSER='/usr/bin/most -s'
小明初学 C 语言,写了个程序,想打印 99 个 '#'. 程序如下:

int i, n=99; main() { for(i=0; i<n; i--) { printf("#"); } }

但是这个程序是错的.

Question 1:  请大家帮他改正, 但只允许  1) 删除一个字符 or 2) 增加一个字符 or 3) 改变一个字符
Question 2:  同样的限制条件, 使得只打印一个 '#'
Qeustion 3:  同样的限制条件, 打印 100 个 '#'


           ------------ DONT SPOIL THE FUN ---------------
---- 华丽的分界线, 请大家确保对上述每个问题思考 10 分钟再往下看 ----


Question 4: 请大家用自己喜爱的 scripting language 编个程序来解决以上 3 问
:diffsplit {filename}set diffopt=vertical[c & ]c:diffget:diffput:diffupdate
:help
using声明扩展基类中函数的作用域.


Alt+F2: free the fish
Alt+F2: gegls from outer space

apt-get --help

=Game("StarWars")

binding "my-bindings"
{
  bind "Return" { "insert-at-cursor" ("\n") }
  bind "<ctrl>Return" { "message_send" () }
}
widget "*pidgin_conv_entry" binding "my-bindings"
(set-fontset-font (frame-parameter nil 'font)
  'unicode '("DejaVu Sans YuanTi" . "unicode-bmp"))
xiaogaozi@LAN:~$ java -version记下其中的版本号, 然后在Emacs中执行
java version "1.6.0_06"
Java(TM) SE Runtime Environment (build 1.6.0_06-b02)
Java HotSpot(TM) Server VM (build 10.0-b22, mixed mode)
M-x costomize-variable <RET> jde-jdk-registry将其中的Version项修改为刚才记下的版本号就行了.
C-x C-f
C-x C-s
!"保存所有缓冲区
C-x d
:e .", 下面是一些常用命令:
^ | 访问目录的父目录 |
q | 退出缓冲 |
R | 重命名 |
D | 删除文件 |
C-x C-f | 创建文件 |
+ | 创建目录 |
g | 刷新缓冲所有文件 (这很有用, 当你新建了文件以后, 需要手动刷新) |
C-@
C-x <SPC>, 但是因为这个组合键同GDB的设置断点的组合键冲突, 于是我稍微修改了一下:
;; Replace `C-@' to `C-^'.
(global-set-key (kbd "C-^") 'set-mark-command)
M-w
M-w来选定一行文本:
;; Make `M-w' can copy a line.
(defun xiaogaozi-kill-ring-save (&optional n)
  "If region is active, copy region. Otherwise, copy line."
  (interactive "p")
  (if mark-active
      (kill-ring-save (region-beginning) (region-end))
    (if (> n 0)
        (kill-ring-save (line-beginning-position) (line-end-position n))
      (kill-ring-save (line-beginning-position n) (line-end-position)))))
(global-set-key (kbd "M-w") 'xiaogaozi-kill-ring-save)
C-x h
C-w
C-y
C-/
C-x r k
C-x r y
C-x r t STRING <RET>
C-x r o
C-x r M-w
;; rect-mark.el
;; Support for marking a rectangle of text with highlighting.
(define-key ctl-x-map "r\C-@" 'rm-set-mark)
(define-key ctl-x-map [?r ?\C-\ ] 'rm-set-mark)
(define-key ctl-x-map "r\C-x" 'rm-exchange-point-and-mark)
(define-key ctl-x-map "r\C-w" 'rm-kill-region)
(define-key ctl-x-map "r\M-w" 'rm-kill-ring-save)
(define-key global-map [S-down-mouse-1] 'rm-mouse-drag-region)
(autoload 'rm-set-mark "rect-mark"
  "Set mark for rectangle." t)
(autoload 'rm-exchange-point-and-mark "rect-mark"
  "Exchange point and mark for rectangle." t)
(autoload 'rm-kill-region "rect-mark"
  "Kill a rectangular region and save it in the kill ring." t)
(autoload 'rm-kill-ring-save "rect-mark"
  "Copy a rectangular region to the kill ring." t)
(autoload 'rm-mouse-drag-region "rect-mark"
  "Drag out a rectangular region with the mouse." t)
C-x r <SPC> X
C-x r j X
C-x r s X
C-x r i X
M-% STRING <RET> NEWSTRING <RET>
C-M-% REGEXP <RET> NEWSTRING <RET>
C-M-n
C-M-p
M-g M-g
M-;
C-M-\"+x"+y"+gP:ls:buffer #:bnext
:bprevious
:bfirst
:blast:pwd:cd 目录名:e 文件名:wa:e .gf命令, Vim会寻找并打开文件, 如果该头文件不在此目录中, 则可以通过:set path+=目录名m{a-zA-Z}'{a-zA-Z}'' 注意: 这是两个单引号"xy"xp:reg=替换块CTRL-V选定块后, 按c输入替换文本, 然后<Esc>[[ & ]]gd$ cat httpd.conf
DocumentRoot 修改为网站的主目录
同时添加
<Directory "网站主目录">
Options Indexes FollowSymLinks
AllowOverride None
Order allow,deny
Allow from all
</Directory>
Can't connect to MySQL server on 'localhost' (10061)在网上搜寻很久都没有找到解决办法, 最后干脆把MySQL重装了一遍, 结果这个错误神奇地消失了, 于是我觉得最好先安PHP, 再安MySQL.

xiaogaozi@LAN:~$ sudo apt-get install mylove
[sudo] password for xiaogaozi:
正在读取软件包列表... 完成
正在分析软件包的依赖关系树
读取状态信息... 完成
E: 无法找到软件包 mylove
$ sudo vim /etc/fonts/conf.d/49-sansserif.conf修改最后一个
<string>对中的"sans-serif"为"WenQuanYi Zen Hei", 重启浏览器即可.| 署名-非商业性使用-相同方式共享 |


$ sudo usermod -a -G vboxusers `whoami`
$ sudo groupadd usbfs
$ sudo usermod -a -G usbfs `whoami`
$ cat /etc/group | grep "usbfs"比如在我的机器上显示的是
usbfs:x:1001:xiaogaozi那么usbfs的GID就是1001
$ sudo vim /etc/fstab在末尾添加
none /proc/bus/usb usbfs devgid=<yourgid>,devmode=664 0 0
$ sudo apt-get install scim-bridge-client-qt然后注销就可以了.


subcp=cp936  # cp936=gb2312
subfont-text-scale=5
$ cd ~/.mplayer
$ ln -s /usr/share/fonts/truetype/wqy/wqy-zenhei.ttf subfont.ttf
而Ubuntu 9.10则不需要链接中文字体 (因为链接了也没用...), 在使用
mplayer播放时加上"-ass"参数即可, 比如:
$ mplayer -ass filename

以下操作基于Web界面
Options:
client_name -> yourname
max_hard_upload_rate -> 20
max_hard_download_rate -> 0
ED2K-max_connected_servers -> 200
ED2K-force_client_high_id -> true
ED2K-force_high_id -> true
enable_kademlia -> true
Servers:
Import Server.met -> http://www.emule.org.cn/server.met
然后打开"~/.mldonkey/downloads.ini"文件, 找到web_infos, 修改"server.met"后的值为"http://www.emule.org.cn/server.met", 删除 ("guarding.p2p", 96, "http://www.bluetack.co.uk/config/level1.gz"); 一行.